Thursday, December 18, 2008

Sweet Potato and Scallion Latkes


It's been a while since I've posted a recipe, but this time of year is a busy one in our family... so my time is a little more limited than usual. Expect an onslaught of posts after the new year though.

Let me preface this recipe by saying that, in early November, I got to do something awesome. I not only got to meet my favorite chef, Cat Cora, I also got to spend a little time talking with her and her family, watch her prepare one of the recipes from her latest cookbook (Cooking From the Hip), AND sample the food too! As if anything could be better than that, we got to do all of this at Epcot's Food and Wine Festival in Walt Disney World. How all of this came about is a bit of a long story, but let me just say that Ms. Cora is a truly wonderful person who went FAR out of her way for a couple of her fans.

Anyway, I was given a copy of Cooking From the Hip during our visit, and promptly began reading it when we got home. This is one of the many wonderful recipes from the book. I highly recommend the book, the recipes are fun, classy and delicious!

1 pound sweet potatoes, grated (about 2 medium)
2 large eggs, lightly beaten
1/2 cup, plus 2 tsp all purpose flour
1 tsp kosher salt
1/2 tsp freshly ground black pepper
2 scallions, finely chopped
1/2 cup vegetable oil for frying
3 Tbs chopped fresh chives or scallions for garnish
(Cat also recommends creme fraiche and smoked trout as garnishes)

Grate sweet potatoes using the large holes of a box grater or food processor blade.

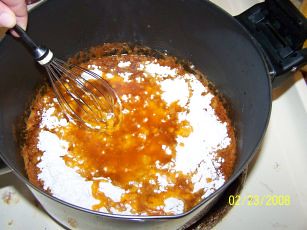
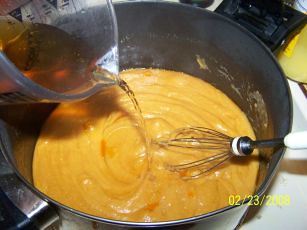
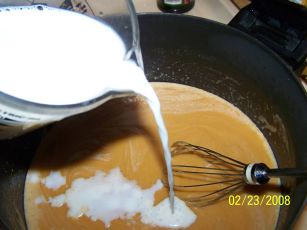
In a large bowl, whisk together the eggs, flour, salt and pepper. Add the sweet potatoes and scallions and mix until the potatoes are well coated.

Heat 3-4 Tbs of the oil in a 12 inch non-stick skillet over medium high heat until the oil is hot, but not smoking. Spoon 1 Tbs of the potato mixture into the oil and flatten with a spatula to about 3 inches in diameter. Repeat, adding 2 to 4 more latkes and more oil as needed, but don't crowd the pan. Give yourself room to flip them without breaking any. Reduce heat to medium and cook until golden, about 2 minutes on each side. Transfer lateks to a paper towel lined plate to drain and then keep warm in a 300º oven. Add more oil to the pan as needed in between batches.

To serve, sprinkle with chives or scallions, or top with a spoonful or creme fraiche and a chunk of smoked trout.


Many thanks again to Cat Cora, Ashley and the staff at Disney for an awesome day!

Saturday, November 22, 2008

Eggplant Parmesan


I'm not a huge fan of Italian food, it's not that I hate it or anything, I just tend to not go out of my way to make or eat it. Eggplant parmesan, however, is a different story, if it's made right, I'm there! I'm not going to lie to you though, making it right is a pain in the behind. If you're up to a little work though, this is a dish that's well worth it.

2 large eggplants, peeled and sliced 1/4" thick
4 eggs, beaten with 1/4 cup milk
all purpose flour
Italian breadcrumbs
oil for frying
1/2 cup freshly grated parmesan cheese
3 cups shredded mozzarella
spaghetti sauce (use homemade if you can)

Preheat oven to 350º. Preheat oil in deep fryer or deep frying pan to 350º.

Coat each slice of eggplant in flour, then dip in egg mixture and finally coat in breadcrumbs. Allow slices to sit for 10 minutes or so to set coating. Fry slices 4 or 5 at a time until golden brown on each side, about 3-4 minutes total. Remove eggplant to wire wrack set over paper towels.

Coat the bottom of a 13x9" baking dish with a thin layer of spaghetti sauce. Then layer in eggplant slices, 1/3 of the parmesan, some more sauce and 1/3 of the mozarella. Repeat layers 2 more times ending with Mozzarella. Bake at 350º for 40 minutes or until casserole is hot all the way through and cheese is slightly browned on top.

Nana's Enchiladas


When I make chili I always have a ton of leftovers, which is great on the budget, but I do get a little tired of it after the second day. So, what I normally do is freeze whatever is left over after the second day and save it for this recipe. Granted, this isn't the most authentic recipe for enchiladas, but it's yummy and easy on the wallet.

Leftover chili (at least 4 cups)
2 15 oz cans enchilada sauce (hot or mild)
18-20 6" corn tortillas
2 large onions, chopped
oil for frying
3 cups shredded Mexican blend cheese

Mix together the leftover chili and enchilada sauce. Set aside.

In a large frying pan, saute chopped onions in about 2 Tbs oil until soft. Set aside.

In a small frying pan heat 1/4" of oil over medium-high heat. Fry each tortilla about 10 seconds, just until soft, don't let them get crisp. Remove to paper towels.

Spread about 1 cup of the chili mixture in the bottom of a 13x9" baking dish.

Place a few Tbs of cheese and onion in each tortilla and roll, place seam side down in baking dish, packing them together tightly.


Top enchiladas with any remaining onions and pour remainder of chili mixture over the top. Top with remaining cheese. Bake at 350º for 30 minutes or until hot and bubbly.

Sunday, October 26, 2008

Honey Walnut Shrimp


A few years ago, back when we actually had the time and money to go out to dinner, Erich ordered Honey Walnut Shrimp at our favorite Chinese place. It was SO good, deep fried shrimp with a light crispy coating and toasted walnuts drizzled in a creamy, sweet sauce. I made a mental note that I needed to learn how to make it, and... I just got around to that last week. It came out really well, the saltiness of the shrimp and mild onion flavor from the green onions contrast nicely with the sweetness of the sauce and walnuts. This is a great recipe to make if you have kids who like seafood.... and mine do. I doubled this recipe and there was NOTHING left.

1 Tbs butter
1/2 cup walnuts
1 tsp brown sugar
pinch of salt

Melt the butter over medium heat in a small saute pan. Add the walnuts and saute for 1 minute. Sprinkle brown sugar and salt over nuts and stir to coat. Continue cooking 1 more minute, stirring constantly. Remove from heat and set aside.

2/3 cup rice flour (if you can't find rice flour, cornstarch will work)
3 eggs, beaten
salt and pepper to taste
1 lb large shrimp, peeled and deveined
1/4 cup mayonnaise
1 Tbs honey
2 Tbs sweetened condensed milk
1 Tbs rice vinegar
3 green onions, chopped
oil for frying

Heat 2 inches of oil in a heavy skillet or electric skillet to 350ºF. Mix beaten egg, rice flour and salt and pepper in a medium mixing bowl. Toss shrimp in batter mixture and deep fry a few pieces at a time until golden brown, about 3 minutes. Drain on paper towels.

Mix together mayonnaise, honey, condensed milk and rice vinegar.

To serve, place shrimp on a plate, sprinkle with walnuts and drizzle with the sauce. Top with green onions to taste.

Saturday, October 11, 2008

Chicken Chow Mein


With the economy being what it is, prices being so high on everything and only having one income due to a crummy job market, I've been trying to stretch our food budget a little more than usual. Part of that has been going back to old standby recipes, and part of it has been finding recipes that use items I always have on hand. If the recipe makes enough for 6 people to eat for 2 meals... even better!

This one came about while I was browsing for chicken recipes. I knew I had only 4 breast halves in the freezer, meaning that in order to stretch that for 6 people, it would have to be a casserole or stir fry. I came across a recipe for Chicken Chow Mein. Now, I don't know about you, but this was a dish my mother made in the 70's... and granted, as a kid I liked it, but the majority of it came from a can. The last time I had tried the version from a can, it wasn't quite what I remembered. But I was willing to give it another shot... on my terms. This began my search for a REAL recipe for Chow Mein. I found quite a few, took my favorite parts of each one and came up with this. Not only did it stretch those 4 chicken breast halves to feed all 6 of us, it also made enough for leftovers for Monday... BONUS! I also had most of the ingredients on hand already, the only purchase I made for this was the bamboo shoots, beans sprouts and cabbage... which cost all of $2.40.

4 large chicken breast halves (about 2 lbs), cut in bite size pieces
3 Tbs canola or vegetable oil
salt and pepper to taste
2 ribs of celery, sliced
1 med onion, chopped
2 cloves garlic, minced
2 tsp grated fresh ginger
12 oz package sliced mushrooms
2 handfuls fresh bean sprouts
1/2 small head of cabbage, sliced
1 cup chicken stock or broth
7 Tbs soy sauce
2 Tbs oyster sauce
1/2 cup rice wine
3 Tbs honey (I prefer honey, but you can use sugar)
1/4 cup water
3 Tbs cornstarch
6 green onions, white and green parts chopped
cooked rice
crispy chow mein noodles


Heat oil in large frying pan over med-high heat. Season chicken to taste with salt and pepper, then brown in hot oil. Remove chicken with slotted spoon and set aside.

Add celery and onions to the pan, and saute 2 minutes, stirring often. Add garlic, ginger, mushrooms, bean sprouts and cabbage. Continue cooking 2 more minutes or until vegetables just start to cook down.

Mix together chicken stock, soy sauce, oyster sauce, rice wine and honey in a medium mixing bowl. In a small bowl, whisk together water and cornstarch until smooth, then add to the broth mixture, mixing well. Add sauce mixture to the pan, stirring almost constantly until sauce begins to thicken.

Return chicken to the pan, add green onions and heat through. Serve over rice and top with chow mein noodles.

Sunday, September 21, 2008

Grilled Shrimp


Grilled shrimp, it can be great or just ok, and sometimes even really bad. For a long time we stayed away from making shrimp on the grill because it usually came out very dry and tough, then I found an article on brining shrimp before grilling, and we decided to give it one more shot. Not only did our shrimp come out great that time, it comes out great EVERY time. The shrimp takes on an entirely different texture, almost like lobster, it's, for lack of a better word, awesome.

There is one other little trick, leave the shell on. To make this easier, we buy EZ-Peel shrimp, the shell is slit down the back and the shrimp has been deveined already. If you absolutely can't stand the thought of leaving the shell on, go ahead and remove it, but it will result in slightly drier shrimp.


The Brine

1 qt water
1/3 cup kosher salt
1/3 cup brown sugar
1 tsp cajun seasoning (optional)
ice
1 lb large shrimp, shells on

Stir the salt, sugar and seasoning into the water in a large bowl until both dissolve. If you're using fresh shrimp add about 2 cups of ice. If you're using frozen shrimp just add them straight to the brine (they'll thaw in the brine by the time you're ready to cook). Cover the bowl and allow to sit for 30 minutes on the counter, or up to 2 hours in the fridge.

The Marinade

This part is really all up to you, as long as you add a little oil to your marinade, anything goes here. This is just the way we like to do it.

1/3 cup extra virgin olive oil
1/2 cup white wine
blackening seasoning and hot sauce to taste

Whisk all together, Drain the brine from the shrimp and rinse lightly, drain again and toss in marinade. Allow to sit for 10 minutes.

The Shrimp

Skewer the shrimp on metal or soaked bamboo skewers. Cook over a hot fire for 2-4 minutes per side (depending on the size of your shrimp).

This recipe doubles very easily, and you may want to go ahead and double it... the leftovers are wonderful in a salad or just to take for lunch the next day.

Friday, September 12, 2008

Fish Tacos


When I first heard of fish tacos, I was on a business trip in Southern California. I have to admit, my first thought was... ewww, GROSS! Then, I happened to walk by the entrance to a restaurant that specialized in fish tacos... the wonderful smells coming from inside were enough to persuade me to try one and I was hooked. Unfortunately, at the time, fish tacos hadn't quite made their way to my small town in Florida, so I had to learn to make them myself. I also had a lot of convincing to do as far as my family was concerned, but they're brave souls and fairly accustomed to my experimenting... so now they're hooked too.

Fair warning, I think there are about 5 million calories in one of these... just so you know :)

1 lb fresh mahi mahi (you can really use just about any fish you like though)
1 1/2 cups all purpose flour
12 oz bottle of good beer
1 tsp sugar
1 tsp salt
1 tsp adobo seasoning
1/4 tsp cayenne pepper
Mexican cream sauce (recipe follows)
salsa or pico de gallo
2 cups shredded cabbage
crispy taco shells or soft flour tortillas
oil or shortening for deep frying

Preheat enough oil to cover fish in an electric frying pan or deep fryer, to 375ºF.

Cut mahi mahi into 1/2 inch cubes.

In a large bowl, whisk together flour, sugar, salt, adobo, cayenne and enough beer to make the batter slightly thinner than pancake batter.

Dip fish pieces in batter, then drop into hot oil, being careful not to crowd the pan (I usually do about 10 pieces at a time). Fry until golden brown, about 3-4 minutes, and then drain on paper towels.

When fish pieces have cooled slightly, fill taco shells or tortillas with a few pieces of the fish, some cream sauce, salsa and shredded cabbage.

Mexican Cream Sauce

1/2 cup mayonnaise
1/2 cup sour cream or plain yogurt
1/4 tsp adobo seasoning
2 Tbs finely chopped fresh cilantro
1/2 tsp dried oregano
juice of 1/2 lime

Mix all ingredients together. Refrigerate covered at least 1 hour before using.

This sauce is also excellent with regular tacos.

Artichoke Toasts


When my family gets together there tends to be massive amounts of food involved. Whether it's a mid-afternoon birthday gathering for one of the kids, a get-together for a visiting family member or friend, or just the typical holiday activities throughout the year.. we ALWAYS have a ton of food. In order to keep things interesting, I'm always on the lookout for really great appetizers that I can either bring fully prepared, or at least do most of the prep work ahead of time and throw together quickly in my Mom's kitchen. This is one of those recipes. I originally got the idea from an episode of $40 a Day with Rachel Ray, but have put my own twist on things to make the prep more simple and less time consuming, and also to suit my taste a bit more.

1 thin French Baguette (about 1 1/2" in diameter)
olive oil
2/3 cup mayonnaise
1 tsp Thai chili garlic paste
1/2 tsp fresh lemon juice
1/4 tsp onion powder
1/4 tsp garlic powder
1/2 tsp honey
1 Tbs freshly grated Parmesan cheese
salt and pepper to taste
1 jar marinated artichoke hearts
1/4 cup chopped roasted red bell pepper (the jarred ones work fine)

Preheat oven to 300ºF.

Slice baguette into 1/2" thick rounds and lay out on a baking sheet. Brush tops of bread slices with olive oil and bake until lightly toasted (about 7 minutes).

Mix together the mayonnaise, chili garlic paste, lemon juice, onion powder, garlic powder, honey, cheese, salt and pepper. Set aside.

Coarsely chop artichoke hearts and mix with chopped red pepper in a small bowl.

When the baguette rounds are toasted, spread a generous amount of the mayo mixture onto each one and then top with the artichoke pepper mixture. Serve immediately.

Everything but the assembly of these can be done ahead of time. If I make it the day before and have to refrigerate the ingredients, I usually warm the assembled toasts in the oven for a few minutes so they aren't ice cold.

Tuesday, September 09, 2008

Shan's Guinness Chili


Is there anything that starts the fall off better than the beginning of football season? Personally, I crank up the a/c, light some autumn-y smelling candles and start cooking on the first Sunday of football season. Ok, I know.. I'm weird... but hey, we poor New Englanders stuck down here in FL have to do some crazy things to get our fix of autumn :)

Chili is definitely a personal taste sort of dish. Some prefer the Texas version, some the Cincinnati version, so and and so forth. This one has beans and tomato, so it's definitely not a Texas style, I guess it's kind of a New England Irish girl's take on it (blasphemy, I KNOW!), but I promise, it's REALLY good and worth the work. Another advantage, it's always even better as leftovers and makes a great sauce for onion and cheese enchiladas (coming soon!).

2 slices bacon
2 - 3 lbs coarse ground chuck (chili grind)
3 medium onions, chopped
1 Tbs minced garlic
1 - 2 fresh jalapenos, seeded and finely chopped
2 tsp minced chipotle peppers in adobo sauce
2 Tbs ground cumin
1 Tbs ground coriander
1 Tbs beef bouillon granules
1 1/2 tsp adobo seasoning
2 tsp dried cilantro (or 2 Tbs fresh, chopped)
3 Tbs chili powder
3 Tbs ancho chili powder
1/2 tsp onion salt
1/2 tsp garlic salt
1 tsp sweet paprika
15 oz can chili ready tomatoes, undrained
12 oz bottle Guinness Extra Stout
14.5 oz can beef broth
2 28oz cans crushed tomatoes with puree
2 tsp sugar
kosher salt to taste
1 large can pinto beans, drained
1 small can dark red kidney beans, drained

Render bacon over medium heat in a large dutch oven until almost crisp. Remove bacon with slotted spoon and discard or save for another use. Add ground beef, onions, garlic and jalapenos, cook stirring often until beef is browned and onions have begun to soften. Add minced chipotles through paprika and stir well to combine. Add all remaining ingredients except beans and simmer 1 1/2 - 2 hours, stirring occasionally, or until desired thickness is reached (if you like very thick chili you may want to add some tomato paste). Add beans and cook an additional 20 minutes. Serve with sour cream, green onions and shredded cheese if desired.

This recipe, as is, uses ground beef, but sometimes I use shredded beef as well. Making the shredded beef is easy enough, just season a boneless chuck roast with chili powder, salt and pepper and brown on both sides in a dutch oven. When both sides are browned add 1 bottle of Guinness stout and enough beef stock to cover. Cover and place in a 300º oven and just let it cook for 2-3 hours until the meat comes apart easily with a fork. To use the shredded beef, skip the ground beef instructions and add the beef in the last 30 minutes of cooking.

Saturday, August 23, 2008

Lamb Stew


Yes, I know it's August... and yes I realize I live in FL and I even know that it seems pretty weird for me to making lamb stew in August, but I did it anyway. Actually it worked out rather well as it was the perfect, comforting dish to eat through that nasty Tropical Storm Fay. It was windy and rainy and there was more water out there than I can even begin to tell you. Because I work for a 24 hour technical support call center I had to go to work in all that nastiness, and I came home rather soaked 2 days in a row... so this cold weather comfort food was more than welcome this week.

This isn't quite the most traditional Irish lamb stew out there (I use white wine in it), but it will certainly warm you up once the days start getting cooler. At first glance this may seem like a rather expensive recipe, but it costs me around $25 to make (check your local discount club like Sam's, BJ's or Costco for the lamb, it's usually MUCH cheaper there, I normally manage to pick up boneless lamb roasts for about $16) and feeds my hungry family of 6 for 2 days... AND it's one of those dishes that's even better the second day, so it won't seem like sloppy leftovers (ok, hopefully I'm done with the run-on sentences for now)! I like to make this on a Sunday and save the leftovers for a busy night when I need something quick.

1/2 lb thickly sliced bacon, diced
3-4 pounds boneless lamb leg, cut into 1 inch pieces
1/2 teaspoon ground black pepper
1/4 cup all-purpose flour
1/2 teaspoon salt
3 cloves garlic, minced
1 large onion, chopped
1/2 cup water
4 cups beef or lamb stock
2 bay leaves
1 cup dry white wine
2 teaspoons white sugar
4 cups baby carrots
3-4 potatoes, peeled and cut in chunks
1 teaspoon dried thyme
2 cups frozen green beans
1 can peas, drained

Saute bacon in large dutch oven until crisp, reserve fat in the pan and set bacon aside.

Put lamb, salt, pepper and flour in large mixing bowl and toss to coat meat evenly. Brown meat in frying pan with bacon fat. Add onions and garlic and continue to cook a few more minutes until onions begin to soften. Add wine, stock, water, sugar, thyme and bay leaves. Cover and simmer 1 1/2 hours or until meat is very tender.

Add bacon pieces, carrots and potatoes and continue simmering, covered, about 20 minutes, until potatoes and carrots are tender. Add the green beans and peas just before the carrots and potatoes are done. Taste and adjust seasoning.

Monday, August 11, 2008

Pastrami Wower


This is my entry for Snackshots #6


Ok, ok I know the title is hokey... but my kids came up with the name and I thought I'd humor them by actually using it.

This is probably my all time favorite sandwich. I was never a big fan of pastrami sandwiches when I was younger, mostly because the only way I'd ever seen or tried them was on rye bread with mustard... this was the way my Dad ate them. My husband, however DOES like pastrami and we occasionally had it in the house. I was really hungry for a sandwich one day and out of desperation decided to give pastrami another shot, but this time on MY terms. My husband, also being a pastrami with mustard kinda guy, was a little skeptical of my creation... until he tried it. Now I get asked to make these all the time, and to be honest... I don't mind :)

6 fresh kaiser rolls or 4 good sub rolls
1 1/2 lbs shaved pastrami
1 Tbs olive oil
1 large onion, sliced thin
2 medium vine ripened tomatoes, sliced
provolone cheese slices, 1 or 2 per sandwich
Shan's "special" sauce (recipe to follow)

Preheat oven to 350ºF.

Saute onions in olive oil over low heat until soft and lightly browned. Meanwhile, split the rolls and place cut side down on a hot buttered griddle to toast. When rolls are light toasted remove from the griddle and place the bottom halves on a large cookie sheet. Spread each of the cut sides of the rolls with special sauce. Equally divide shaved pastrami on the roll bottoms and top with sauteed onions and cheese. Place roll tops on the cookie sheet next to the sandwiches (don't top them yet) and place in the oven until the cheese melts, about 1-2 minutes. Top melted cheese with tomato slices and roll top.

Special Sauce

1/2 cup real mayonnaise
1/4 tsp lemon juice
1/4 tsp Thai chili garlic sauce
pinch of garlic powder
pinch of onion salt
2 tsp grated parmesan/romano blend cheese

Mix all together and refrigerate at least 30 minutes before using.

Sunday, August 10, 2008

My version of Carnitas


Carnitas are probably my favorite Mexican dish. I'm a little hesitant to order it at restaurants though, as it seems to be difficult to find a Mexican restaurant that makes them fresh. Half the time I end up with over cooked, charred bits of pork that would break teeth and other times the pork tastes as if it's been cooked the day before in old grease and then reheated. So, awhile back I set out to find a recipe I could make at home that I actually liked, after a few combinations and tweaks, this is what I came up with.


2 Tbs olive oil
2 medium onions, quartered
4-5 lbs boneless country style pork ribs
1 jar Goya sofrito
4 cups chicken stock
1 Tbs dried cilantro
1 Tbs ground cumin
1 Tbs dried oregano
2 tsp chili powder
1 Tbs hot sauce

Heat olive oil in a large, high sided, heavy skillet, or dutch oven over medium high heat. Add quartered onions and cook, stirring for 1 minute. Add boneless ribs, sofrito, chicken stock, spice and hot sauce. Stir all together, cover and simmer for 3 hours or until meat pulls apart easily with a fork.


Meanwhile, preheat the oven to 450ºF. Cut the following into large chunks (seeds removed), place in a large roasting pan and coat ligtly with olive oil:

2 green bell peppers
1 red bell pepper
4 poblano peppers
2 medium onions

Roast vegetables until they start to brown slightly, about 15 minutes, stirring every 5 minutes. Remove from oven and empty vegetables into a large bowl. Allow to cool slightly. With a knife and fork, cut vegetables into smaller chunks; set aside.


In the same roasting pan, add 1/4 cup of lard or shortening and place the pan back in the 450º oven until fat melts and is hot. Add pork to the hot fat and cook 5 minutes, stir and cook 5 minutes more, until edges of pork and slightly browned and crisp.


Serve with refried beans, roasted onions and peppers, and pico de gallo (my favorite is from The Pioneer Woman). Sometimes I serve this on warm flour tortillas like you would find in the restaurants, sometimes I like it by itself. Feel free to top it with guacamole, sour cream, cheese... whatever you like.

Chicken Marsala


I love this recipe. It tastes like it took all day to make, but it's easy enough to throw together for a quick weeknight meal.

1 cup flour
salt and pepper to taste
4-6 boneless chicken breast halves, pounded to 1/2" thickness
2 Tbs olive oil
2 Tbs butter
8oz package of fresh mushrooms, sliced
3/4 cup marsala wine
1 cup chicken stock

In a shallow dish combine flour and salt and pepper to taste.

Add olive oil and butter to a large skillet and melt over medium high heat.

Dredge chicken in flour and brown on both sides in hot oil/butter mixture. Set chicken aside and keep warm. Add mushrooms to pan and saute until soft. Add wine and scrape up any brown bits in the pan, reduce heat and simmer until reduced by half. Add chicken stock and bring back to a simmer. Return chicken to pan, cover and simmer until chicken is cooked through and sauce has thickened.

Spaghetti Sauce


I never had jarred spaghetti sauce when I was a kid. In fact my Dad is somewhat famous in our (rather large) family for his sauce, and my Mom made a pretty darn good version of it too. When I moved out on my own and had to resort to jarred sauces, I was not a happy camper. Eventually I talked my Mom into showing me how to make the "real stuff", and with a few tips from my Dad I was on my way! It does take some work, but the recipe makes a LOT of sauce and freezes very well. We usually eat this for a day or two and then I freeze the rest in quart size ziploc freezer bags for later.

I'm going to warn everyone now, my measurements for this are approximate, so if something looks too much or too little for your taste, just use the amount you prefer. This is one of those recipes that really turns out well in many variations, so don't be afraid to make it your own!

Extra virgin olive oil
1 large onion, chopped
2 green bell peppers, chopped
3-4 Tbs minced garlic
4 6oz cans tomato paste
1 can Campbell's condensed beef broth
28 oz can Progresso tomato puree
28 oz can Progresso crushed tomatoes
1 bottle of red wine (I like Merlot)
2/3 cup fresh flat leaf parsely, chopped (or a few Tbs dried)
1/2 cup fresh basil, chopped (or a few Tbs dried)
1 Tbs salt
1 Tbs accent (optional, don't use if you're sensitive to MSG)
3 Tbs dried oregano
1/2 tsp garlic salt
1/2 tsp onion salt
black pepper to taste
2 tsp sugar
2 handfuls grated Parmesan/Romano cheese blend
few dashes Worcestershire sauce
1 lb beef soup bones
1 package sweet Italian sausage, links cut into 2-3" pieces

Add enough olive oil to coat the bottom of a 5-6 quart heavy saucepan. Saute onions, peppers and garlic over medium low heat until onions are transluscent. Add tomato paste and beef broth, stirring to mix well. Add tomato puree, crushed tomatoes and wine (yes, the WHOLE bottle, stir all together. Stir in remaining ingredients and allow to simmer covered over low heat for 3 to 4 hours being sure to stir well every 20 to 30 minutes. You can adjust seasonings to taste after 2 hours (give the flavors time to develop). When done, remove the bones and discard, set the sausage pieces aside to serve with your meal.

Shepherd's Pie


I think shepherd's pie is probably one of the ultimate comfort foods. I actually have two versions that I make, one that's a bit more involved and expensive (I'll show you that one soon), and this more traditional, budget friendly version. This is a great dish to make on a Sunday and have for leftovers on a busy weeknight, I think it actually tastes better after a day or two.

You can use any mashed potato recipe you like for this, but for mine I put in a lot of shredded sharp cheddar, half and half and REAL butter. It's worth it, give it a try :) Also, I use a mix of ground beef and lamb, but you can use one or the other.

3-4 carrots, diced
1 medium onion, chopped
1 pound lean ground beef
1/2 - 3/4 lb ground lamb
1 clove garlic, minced
4 green onions (white & green parts), sliced
3-4 tablespoons flour
onion salt and garlic salt to taste
1 1/2 cups beef stock
1/2 cup white wine
2 tablespoon tomato paste
1 can green peas, drained
mashed potatoes
grated sharp cheddar

Make mashed potatoes the way you normally would, add about 1 cup of the cheese to it, mixing well; keep warm.

In a large skillet, saute the onions and carrots in a little olive or vegetable oil until the vegetables begin to soften. Add the ground lamb and beef and cook until browned. Drain off most of the grease, leaving a little in the pan. Add the flour and continue cooking over medium heat for 2 minutes to cook the flour. Stir in wine, stock, tomato paste and seasonings until well mixed. Add green onions and peas, contiue cooking until mixture thickens to a consistency you like. Pour into a 13x9" glass baking dish, top evenly with mashed potatoes. Bake at 350ºF for 30-40 minutes, or until potatoes begin to brown slightly around the edges. Top with additional cheese for the last 5 minutes of cooking time if desired (or sprinkle with paprika before baking).

Thursday, July 24, 2008

Oven Fried Chicken


I LOVE fried chicken. When I think of making fried chicken though, I almost always come up with a number of reasons not to make it. For starters, it's time consuming and makes a huge mess of the kitchen, then there's that pesky nutrition thing... fried chicken is just plain bad for you. So, it was time to come up with an alternative.

I've always looked at oven fried chicken recipes a little suspiciously, to me they just never looked they would work well or the recipe used bread crumbs, which... well , just reminds me a bit of shake n bake. This week, however, I decided to try one of the recipes I had set aside a while back and give it a shot. Not only was it healthier than fried chicken, it tastes really good and was a whole lot easier and less messy. I was actually very surprised with how well this recipe turned out, it was crispy, flavorful and the coating stayed on! This will now be making regular appearances in our monthly menus as it's quite affordable on top of everything else... WIN WIN WIN!

1 cup low fat buttermilk
1 heaping Tbs whole grain Dijon mustard
1-2 Tbs your favorite hot sauce
12 chicken legs (you can remove the skin to make it healthier, but I left it on)
1 1/2 cups all purpose flour
salt and pepper to taste
cajun seasoning to taste
2 tsp paprika
olive oil cooking spray

Combine buttermilk, mustard and hot sauce in a gallon size zipper top bag, add chicken legs and allow to marinate 2 to 4 hours (you can even let this go overnight if you want).

Preheat oven to 425ºF. Line a baking sheet with foil and place a baking rack large enough to hold all of the chicken pieces on it. Spray the rack with olive oil spray.

Mix flour and seasonings in a medium bowl. Remove chicken from marinade, shaking off excess, and coat in flour. Place on prepared rack. Spray chicken pieces with olive oil spray, turn and spray the other sides. Place in oven and bake 40 minutes, turn and continue baking another 15-20 minutes or until chicken is browned and cooked through.

Tuesday, July 22, 2008

French Onion Meatloaf

Ok, no picture this time. I apologize, but no matter how much I tried, I just could not make meatloaf look pretty. I swear, I DID try, but my lack of photography skill and meatloaf's lack of looking attractive wore me out.... and the kids were getting hungry. So... no picture.

Ok, FINE... if you insist on a picture, here's one of my lovely 2 year old princess patiently waiting for me to serve her dinner.


Happy now? Good. Let's continue.

It's has been brought to my attention that, while I'm posting some good recipes, I haven't really broached the subject of how I manage to feed my larger than normal family on a budget. Well, I plan.. A LOT, and part of that planning is to include meals that I can make on my less busy days that can carry over well to another day where time may be a bit more crunched, either as leftovers or a new concoction that includes the leftovers. This French onion meatloaf is an excellent example.

Let me first start by saying that as an adult I haven't been a big fan of meatloaf in general. It's not that I dislike it, or won't eat it, it's just one of those meals that I hated to see come to the table even when I was a kid. It's boring, dry and oh so 60's/70's "what were we thinking when we ate that stuff?". My husband and children, on the other hand, decided to mutiny one day and insist that I make the "stuff", so I had to find a compromise. I searched, and I experimented, and each time I came up short of what either side of the war was looking for. One day I found this recipe. It was so different I had to try it. It's now been my go to recipe for a number of years (so many that I can't remember where I got the original recipe). This makes a large loaf (2lbs), so miracle of miracles... it's a meal I can actually use as leftovers. It reheats well and makes one heck of a meatloaf sandwich too (according to my husband, I personally draw the line at cold meatloaf sandwiches... sorry.)

Give this one a try, you won't be sorry... it's moist, savory and flavorful, and it works just as well with mashed potatoes and peas as your Mom's meatloaf... maybe even better.

French Onion Meatloaf

1 lb hamburger
1 lb pork sausage (any kind you like)
1 medium onion, diced and sauteed until just cooked through
1 sleeve saltine crackers crushed (may add more if it seems too moist)
1 8 oz container of French onion chip dip
2 eggs

Mix all ingredients together and form into loaf. Bake at 350ºF for 1 hour and 15 minutes or until the center reaches 150ºF.

* You can also make this into 2 smaller loaves and freeze.

Sunday, July 06, 2008

Baked Rice Pudding


Rice pudding is normally something I make when the weather gets cooler, but to be honest, the weather rarely gets all that cool in Florida. If there's an advantage to the weather always being warm or hot, it's that there's central air conditioning that works VERY well. Things that many people wouldn't dream of cooking in the summer come out of my kitchen in the middle of July all the time. If I'm craving one of my comfort foods and it's 98ºF outside... it's ok! It's only 70ºF inside and I can cook whatever I want :)

1 1/4 cups cooked rice
2 1/2 cups milk
1/2 cup sugar
4 large eggs, lightly beaten
seeds from 1 soaked vanilla bean (or 2 tsp vanilla extract)
1/2 tsp ground cinnamon
1/4 tsp ground nutmeg
2/3 cup golden raisins

Preheat oven to 325º.

Mix all ingredients together in a medium bowl and then pour into an 8x8" baking dish. Place the smaller dish inside a 9x13" baking dish and place on center rack in the oven. Pour cups of water into the larger pan to create a water bath. Bake 30 minutes.

After 30 minutes, stir pudding and then continue baking 20 more minutes. Remove from oven and allow to cool slightly before serving. Serve warm with homemade whipped cream and another sprinkle of cinnamon.

Garlic Romano Roasted Potatoes


Potatoes are part of many of our meals in this house. My family loves them in almost every way, shape and form. New potatoes, red potatoes, Yukon golds and russets may end up in potato salad, mashed potatoes, roasted potatoes, baked potatoes, twice baked stuffed potatoes, potatoes au gratin, potato casserole... you get the idea :) And, no matter how many potatoes I cook, I rarely have any leftover for dinner the next night, if they aren't consumed with the meal I made them for, my son WILL finish them as a snack the next day. I can't really complain that my family loves potatoes so much either, they're inexpensive, versatile and easy to prepare.

This is one of our favorites. It's simple and delicious and really bad for you, but... but...YUM!

2 lbs small white new potatoes (you can use the small red ones too if you like)
3 Tbs olive oil
kosher salt and freshly ground black pepper to taste
1/2 stick butter
3 cloves garlic, minced
freshly grated pecorino romano cheese, to taste
2-3 Tbs fresh, flat leaf parsley, finely chopped

Preheat oven to 425º.

Lightly oil a large baking sheet. Cut potatoes in half, or in quarters if they're bigger that about 1 1/2" in diameter, and place in a large bowl. Add olive oil, salt and pepper and toss to coat well. Place potatoes cut side up on prepared baking sheet and bake at 425º for 15 minutes. Turn potatoes cut side down and bake another 10 minutes. Check potatoes after 10 minutes, if they're still not tender enough turn them cut side up again and continue cooking another 5 to 10 minutes. Remove from oven and allow to cool slightly.

Melt butter in a small saute pan over low heat. Add garlic and cook just a few minutes, until garlic is mellowed and butter is infused with flavor. Place potatoes in serving dish, pour butter mixture over them, add chopped parsley and grated cheese ; toss to coat well.

ALWAYS make more of these than you think you need... they go fast! :)

Lamb Skewers


Today was my last day of vacation, so I wanted to do a few things. First, I wanted to relax, and second, I wanted to make a nice meal that wouldn't take a whole lot of work, preferably something for the grill. I had a boneless leg of lamb in the freezer that I'd been drooling over for a week, so lamb skewers it was!

This was our first try at this recipe, and we really enjoyed it. The only thing we may do different next time is to tone down the marinade a bit. I actually like the slight gamey taste that lamb has, and this marinade overpowers it just a bit too much for me. I think next time we'll go with a simpler garlic and white wine marinade.

5 lbs boneless lamb, cut in 1" pieces
6 Tbs Dijon mustard
4 Tbs white wine vinegar
4 Tbs extra virgin olive oil
1/2 tsp salt
1/2 tsp freshly ground black pepper
1/2 tsp dry rubbed sage
1/2 tsp dried oregano
3 cloves garlic, minced
assorted vegetables, bell peppers, onions, mushrooms, etc

Mix together mustard, vinegar, olive oil, salt, pepper, sage, oregano and garlic. Add marinade to cubed lamb in a large ziploc bag or bowl. Refrigerate 4 hours to overnight.

Alternate marinated lamb and vegetables on stainless steel skewers, or wooden skewers that have been soaked in water for 1 hour. Grill over medium high heat about 6 minutes per side for medium doneness.

Clams Casino


One of the advantages of growing up on the New England coast was the seafood. In the summer clams were a staple. Whether it was my grandmother's clam chowder at a family picnic or steamers on a night when my parents just felt like eating outside... we ate a LOT of clams back then.

Now that I live in Florida, I can still get some of those New England clams, but it comes at a slightly steeper price these days, so I tend to reserve the clam consumption for days like the 4th of July. On Thursday I stopped by the best seafood market in town (best because they fly clams and lobster in daily from New England) and picked up some beautiful steamers and chowder clams, as well as some Florida little necks. On Friday, we had a clam feast... Rhode Island style chowder, steamers with drawn butter and... these wonderful little things. This is my father's recipe for clams casino.

1/2 stick butter
1/2 red bell pepper, chopped
1/2 green bell pepper, chopped
1-2 cloves garlic, minced
2-3 doz small hard shell clams (like little necks)
Italian style bread crumbs (optional)
8 slices of bacon, partially cooked and cut into 1" pieces

Preheat broiler.

Melt butter over low heat in a small pan. Add chopped peppers, onions and garlic and cook for 2 or 3 minutes, just until vegetables are tender crisp. Set aside to cool.

Pour about 1/2" of kosher salt on a baking pan large enough to hold all the clams. Shuck fresh clams over a large bowl to catch the liquid. Discard top half of the shell and place bottom half with the clam onto the salt (this will keep the clams straight, and keep them from spilling the butter). Spoon a little of the butter and vegetable mixture into each clam shell and top with a sprinkling of bread crumbs and partially cooked bacon.

Place clams under broiler, about 6 inches from the heat and broil about 4 minutes, or just until the bacon crisps up. Allow to cool for about 10 minutes before serving.

Monday, June 30, 2008

Cuban Churrasco with Chimichurri Sauce


I'm from New England and really consider that to be home, but in reality I've lived in FL longer than anywhere else (over 17 years now). When I first moved here I'll admit to being less than impressed with the food offerings, but then I was 19 and just being stubborn. I've really never been a picky eater, my father was a chef and my mother an excellent cook, so if there's any pickiness to my taste, it's just for quality ingredients and well prepared foods. I slowly warmed to the local cuisine and discovered Cuban food... that was it... I fell in love.

Before anyone comments that churrasco and chimichurri are not Cuban in origin, let me just say that I am aware of that. It's Argentinian or Brazilian, depending on the type of churrasco we're talking about, but the Cubans happen to have a very good version of it also, and that's what I have here today. The 2 main differences are in the marinade for the meat and the fact that the Cuban version of chimichurri contains cilantro as opposed to the traditional flat leaf parsley. I actually like to use a combination of both parsley and cilantro, but you can use either one.

And yes, those are roasted potatoes again, not very traditional, but we love them :)

Marinate 3 to 6 lbs of skirt or plate steak in the following for 8 to 24 hours:

10 cloves garlic
1 teaspoon salt
3/4 cup sour orange juice*
1/2 cup thinly sliced onion
1/2 teaspoon oregano
3/4 cup extra virgin olive oil

Mash the garlic and salt into a paste using mortar and pestle or on a cutting board with the side of a knife. Stir in the juice, oil,onion and oregano.

*You can find bottled sour orange juice, or naranja agria, in the latin section of most grocery stores, but if not just use equal parts fresh lime and orange juice.

Remove the steaks and marinade from the refrigerator about an hour before you plan to grill them. Grill over a VERY hot fire for about 4 minutes per side for medium rare (recommended doneness for this meat). The fire should be hot enough that you can't hold your hand over it for more than a few seconds, this will allow you to get a nice char on the meat.


Remove from the grill and allow to sit for about 10 minutes. Slice thinly on a diagonal across the grain and serve with chimichurri sauce.

Chimichurri Sauce

3-6 cloves garlic (to taste)
1/4 cup red wine vinegar
juice of one lime
1/2 cup onion
1/2 cup flat-leaf parsley
1/2 cup cilantro leaves
1-2 Tbs chopped jalapeños (I use the jarred ones)
salt and pepper to taste
2/3 cup extra virgin olive oil
Put everything except the oil in a blender and pulse until you have a thick mixture. Transfer to a bowl and whisk in the olive oil, you don't want to do this in the blender, it will emulsify. Taste and add more salt, pepper, vinegar and lime juice as desired.

Sunday, June 22, 2008

Roasted Potato Salad with Mustard Dressing


I'm always on the lookout for recipes that are new and different. When I saw a recipe for this salad I copied it and set it aside to try later. Later turned out to be several years, but it was definitely worth it! The first time I tried it was last weekend to bring to my company picnic, and I was sorry I didn't keep it home! A few people have asked me for the recipe, and it made a perfect side dish for the ribs we had for dinner tonight... so here it is. Enjoy!

3 pounds small red or white creamer potatoes,washed and cut in half
1 tablespoon olive oil
1/4 tsp black pepper
1/2 tsp creole seasoning
1/2 teaspoon kosher salt
1/4 to 1/2 cup chopped, crisp bacon (I cheated and used pre-cooked)
2 cups chopped green onion
2 garlic cloves, minced or garlic powder to taste
3 tablespoons country style or whole grain Dijon mustard
3 tablespoons mayonnaise
1 1/2 tablespoons honey
1 1/2 tablespoons champagne vinegar
1/4 cup chopped fresh flat leaf parsley

Preheat oven to 425ºF. Lightly grease a large cookie sheet with olive oil.

Place cut potatoes in a large bowl and add olive oil, pepper, creole seasoning and salt. Toss gently with your hands until potatoes are evenly coated. Pour onto cookie sheet and place in preheated oven.

After 15 minutes turn the potatoes and continue cooking another 15 minutes. Potatoes should be golden brown and cooked through. Set aside to cool completely.

In a large bowl, mix mustard, mayonnaise, honey and vinegar. Add onions, garlic, bacon and potatoes, mixing well to coat. Mix in chopped parsley last and chill at least 1 hour before serving.

Saturday, June 21, 2008

Prime Rib with Roasted Potatoes and Yorkshire Puddings


I love my Mom. Have I mentioned that before? Last week she stopped by and gave me a rib roast... yep, just gave it to me. How can you not love her? This is a fairly small one, but in this case that was perfect since we were missing a kid tonight (another thing I love my Mom for... sleepovers at HER house!). I'll include the cooking times for larger roasts as well though.

When buying prime rib, a good rule of thumb is to figure on about 1 rib per two people. If possible have the butcher cut the bone off the bottom and tie it back on. You should ALWAYS cook prime rib with the bone. If you can't get the bone cut off it's no big deal, it's fairly easy to cut off after cooking.

Ok, so let's start with the roast and potatoes. I started with a 4 1/2 lb 2 bone roast, about 25 or so small white creamer potatoes, 4 medium onions, a little olive oil and salt and pepper. The roast should be close to room temp, so be sure to take it out of the fridge around 2 hours before cooking.

Preheat the oven to 500ºF. Lightly brush the roast with olive oil and season generously with salt and pepper. You can also use any herbs you like. Wash and scrub the potatoes and coat lightly with olive oil, salt and pepper to taste. Peel the onions, cut in half and light coat these with olive oil as well. Place the roast bone side down in a large roasting pan and scatter the potatoes and onions around it.


Place the pan in the oven and set your timer for 15 minutes. After 15 minutes reduce the heat to 325ºF and continue cooking for another 15 minutes. After the second 15 minutes the potatoes should be nicely browned and cooked through. Remove them with a slotted spoon and cover to keep warm.


Return the roast to the oven and continue cooking until it reaches about 120º internal temperature for medium rare or 130º for medium. Check the roast with a meat thermometer after about 30 more minutes for a 2 rib roast (total cooking times for other sizes will follow). Once the roast reaches the desired temperature, remove it from the oven and tent with foil for at least 20 minutes. It will continue cooking and reach the correct doneness.


Now, pour most of the drippings out of the roasting pan into a heat proof measuring cup. Increase the oven temperature to 425º. Pour about 1 tsp of the fat into each cup of a 6 cup muffin pan. Place pan in the oven to heat the fat for about 3 minutes. In the meantine, mix 1 cup of all purpose flour, 1 cup of whole milk, 2 large eggs, 1 tsp salt and a dash each of garlic and onion powder until smooth. Remove the muffin pan from the oven and quickly pour about 1/4 cup of batter into the hot fat. Return the pan to the oven and cook until the Yorkshire puddings are puffed and golden brown.

If you're feeling really ambitious you can deglaze the roasting pan with a little red wine and use this as a base to make a really nice au jus. Just make a roux with the wine/fat mixture and add beef stock. Cook until it thickens up. You probably won't even need to season it as the pan mixture will contain some salt and pepper from seasoning the roast.

Cooking times (the times include the first 15 minutes at 500º, so keep that in mind. Begin checking the temp of your roast about 30 miunutes before the end cooking time and continue checking every 15 minutes after that. If you have an oven proof meat thermometer you can keep an eye on the temp through the oven window, which will allow the meat to cook faster since you're not opening the oven all the time. Just be sure the thermometer is not touching the bone and is as close to the center of the roast as possible).

2 rib roast (4 - 5 lbs) - 70 minutes
3 rib roast (6 - 7 lbs) - 1 1/2 to 1 3/4 hours
4 rib roast (9 - 10.5 lbs) - 1 3/4 to 2 1/4 hours
5 rib roast (11 - 13.5 lbs) - 2 1/4 to 2 3/4 hours
6 rib roast (14 - 16 lbs) - 3 to 3 1/4 hours

Enjoy!

Sunday, June 01, 2008

General Tso's Chicken


This is one of those dishes that I make when I want to impress company, or when I want a favor from someone I know :) It's also the one meal my husband and kids ask me to make most often. Sure, it's a bit time consuming, but once you get the process down you can really get it done in under an hour. On days when I'm really in the mood to spend the day in kitchen (honest, I have lots of days like that!), I serve this with homemade egg rolls and fried rice. Other days I send hubby over to the take-out place down the street for those sides (hey, as Pioneer Woman would say, I'm just keeping it real here). Fresh steamed broccoli also goes well with this, but in all honesty, you don't have to stick to traditional sides... serve it with some rice-a-roni if you like.

Here's the recipe to serve 6:

3 Tbs cornstarch
3 large eggs
1 1/2 lbs boneless, skinless chicken thighs or breasts
oil or shortening for deep frying

Heat oil in deep fryer (I use a deep electric skillet with enough oil to cover the chicken pieces) to 275ºF. If you're using boneless breasts, cut each breast half into 2 or 3 large pieces, pounding the thicker pieces out a bit so all the pieces will cook evenly. You can leave boneless thighs whole.

Whisk the cornstarch and eggs together to make batter. The batter will be very thin, only slightly thicker than the beaten eggs alone. Dip each chicken piece in the batter and place 3 or 4 at a time in oil. I know you may be thinking that I still haven't caught my mistake on the oil temperature, but it wasn't a mistake (come on now, my typing isn't THAT bad!). Let the chicken cook until the coating just turns white and sets slightly, about 1 minute. Remove the chicken pieces to a paper towel lined plate. They should look like this:


This is called velveting the chicken. You can skip this step if you're pressed for time or if you're just feeling lazy that day, but it really does help keep the chicken (especially the breast meat) from getting tough.

Once all the chicken pieces are done, increase the heat to 375ºF (ahh THERE'S the temp you were looking for earlier!). It's going to take that oil a bit to come up to temperature, so while we're waiting let's make the sauce.

3 Tbs cornstarch
3 Tbs sugar
2 1/2 Tbs rice vinegar
3/4 cup soy sauce
1/2 cup chicken broth
1/2 cup water
1/2 cup dry sherry
1 Tbs chile garlic sauce (or to taste)
1 bunch green onions (white and green parts) chopped
2 cloves garlic, minced
1 tsp grated fresh ginger root
4-16 small dried red chile peppers(keep whole)
2-3 Tbs honey
2-3 Tbs sweet and sour sauce

In a medium mixing bowl, combine cornstarch through chili garlic sauce, mixing well. The sauce will be cloudy.

In a large frying pan or wok, heat about 1 Tbs of oil over medium heat. Saute the dried chiles until the start to blacken. Add the chopped ginger, garlic and green onions and saute until fragrant, about 1 minute. Stir the sauce mixture again, and then add to the pan, stirring constantly. The sauce will start out cloudy:


But as it cooks, it will thicken and become a bit translucent, looking more like the General Tso's sauce you're familiar with:


Once this happens, add the honey and sweet and sour sauce to taste (you can also adjust the heat at this point by adding more chili garlic sauce), turn the heat off and go back to the chicken. Fry the chicken pieces in hot oil until golden brown, about 2 or 3 minutes more.


Once all of the chicken is browned, add it to the sauce. Return the pan to medium low heat and simmer the chicken in the sauce about 5 minutes.

Serve each chicken piece with a spoonful of sauce... and if you really want to mess with your kids... some chopsticks :)

Wednesday, May 28, 2008

Ultimate BLT


I was browsing some other food blogs this week when I came across a post for a blogger's ultimate BLT. I began thinking, what makes an ULTIMATE BLT? A BLT is such a simple sandwich by pure definition, bacon, lettuce and tomato on bread. Really though, it is the sandwich of sandwiches, a favorite to all (at least I don't personally know anyone who doesn't like a BLT... I mean, really... it has bacon... how can anyone not like something that has BACON??). I looked around the web and found quite a few definitions of the ultimate BLT, some fairly normal and some a little out there (uhh... hold the pears on my sandwich please). I decided that even though I'm normally willing to try the latest and greatest, I would stick to my ultimate, and here it is:

Homemade peasant bread, sliced thick and lightly toasted (recipe to follow)
homemade chili garlic mayonnaise (recipe to follow)
LOTS of bacon (just trust me on this, make more than you think you need)*
fresh, vine ripe tomatoes, sliced
lettuce (any kind you want, I like romaine or iceburg on mine)
chopped jalapeño peppers

Pile on the bacon, lettuce and tomato, and be sure to give both slices of bread a good slathering of the homemade mayo. As my husband says, it may seem impossible, but this simple sandwich tastes even better than it looks.

*If you're like me, have someone else cook the bacon for you. I'm just not capable of cooking bacon, well... I'm CAPABLE... but there's usually not much left when I'm done "cooking". Hubby has much better self control at this task than I do. I'm of the mind that if I have to stand here and be splattered with little droplets of super hot grease, then I should get to enjoy the spoils of my labor IMMEDIATELY. So yeah... I don't cook the bacon in this house.

Peasant Bread

(I also don't bake, the bread machine is my friend).

1 1/2 cups water
1 tablespoon white sugar
1 1/2 teaspoons salt
3 1/2 cups bread flour
2 1/2 teaspoons active dry yeast

Place ingredients in the pan of the bread machine in the order recommended by the manufacturer. Select Light or Medium Crust cycle; press Start. For a crispier crust, use the French cycle or turn machine off after first rise and start the cycle over.

Chili Garlic Mayonnaise

This is just SO much better with homemade mayonnaise, but store bought will work in a pinch, or if raw eggs are a problem for you.

1 cup homemade mayonnaise
1 Tbs Chili Garlic Sauce
1/2 tsp garlic powder

Mix all of the above together and refrigerate at least one hour before serving.

Saturday, May 24, 2008

Peanut Butter Banana Pie


I'm not a baker. I actually loathe baking, to me it's boring and far too exact. But, it seemed a shame to have a food blog with no yummy desserts (I don't loathe eating baked goods, trust me!). Luckily, my husband is an excellent baker and truly enjoys it. It's only fair that I share my space with him... so may I present Disney Inn's Peanut Butter and Banana Pie, from the Cooking with Mickey Around Our World cookbook.

1 envelope unflavored gelatin
1/4 cup cold water
1 Tbs cornstarch
1 cup milk
3 Tbs sugar
1/2 Tbs butter
2 eggs, lightly beaten
1/3 cup creamy peanut butter
1/2 cup whipped topping, or heavy cream, whipped
1 9-inch graham cracker pie shell
2 small bananas, sliced into 1/8" thick slices

Soak gelatin in cold water. Set aside

In saucepan, dissolve cornstarch in 1/4 cup cold milk. Stir in remaining milk, sugar and butter. Simmer 2 minutes, stirring constantly. Gradually add hot mixture to eggs, stirring well. Return egg mixture to saucepan; cook and stir until thickened (do not boil).

Remove from heat, add gelatin, stiurring until dissolved. Blend in peanut butter. Chill until mixture begins to thicken. Fold in whipped topping. Pour half of filling intp ie shell. Add bananas and top with remaining filling. Refrigerate at least 2 hours. Serve with chocolate sauce and additional whipped topping.

Lobster Bisque: Heaven in a Bowl


It's a little ironic that my first post is lobster bisque. There was a time when culinary achievement for me was not burning something in my crockpot, my how things have changed! This really isn't a difficult recipe, but it is a bit involved and time consuming.... keeping that in mind, please know that you will not be sorry with the investment. Ok, let's get started!

Meet my friends Ethel and Fred! They're each about a pound and a quarter to a pound and a half.


We're just going to let them hang out in the sink and say their goodbyes while we bring a large pot of water to a boil. When I say a large pot, I mean LARGE. I used an 18 qt stockpot that was about 2/3 full.

Once the water is boiling, take your friends and just drop 'em in head first. Seriously... just drop 'em in... it's ok... you can do it. Once the water returns to a boil, let them cook about 10 minutes.


After 10 minutes, fish out your little buddies and let them cook in a strainer in the sink until they're cool enough to work with. This may take a little longer than you think. Keep in mind that when you crack Fred and Ethel apart they'll be full of hot liquid... so if you think they're cool enough, give it another 10 or 15 minutes. While you're waiting, go ahead and cut a few carrots, some celery, garlic and onions into large chunks and throw them into the water in your stockpot. Turn the heat back on to high til it starts boiling again, then turn the heat down and let it begin simmering.

Now it's time to clean the lobsters. To start, separate the claws and tail from the body, just twist them right off.


The easiest way to remove the meat from the tail is to slice down the middle of the underside shell and then just pry it open with your hands. The meat will come right out in one piece.


Now for the claws. The best way I've found to crack lobster claws is to place the blade of a heavy knife on the flatter side of the claw and hit the top of the knife gently with your hand. This makes a crack in the shell and you can then just break it in half. When the claw meat is exposed, go ahead and grab the smaller claw and pull it out, this will remove the cartilage holding the meat in the claw.


Set the meat aside in the fridge until later. If you want you can go ahead and chop it now, but we don't really need to do that until later. Take the bodies and the shells and put them in your stockpot with the veggies you started simmering earlier. Let the stock simmer for at least 2 hours, I usually let mine cook down for around 3 hours. Strain through a fine mesh strainer lined with cheesecloth. What you'll have when you're done is a wonderful lobster stock that you can use in many seafood dishes. The great thing is that you won't need it all for this recipe, so put the leftover stock in ziploc freezer bags in 2 cup servings and freeze for later use. Just save 1 1/2 cups for this recipe. All of the above can be done a day or two ahead.

Ok, now let's make some bisque!

Start by melting 1/2 cup of butter in a large, heavy sauce pan. Stir in 1 Tbs of sweet paprika and then whisk in 1/2 cup of all purpose flour until smooth. This is what you'll start with:


and this is what you want to end up with:


Keep whisking this over medium low heat for about 3 minutes to cook the flour. Next, get some of this (I usually find it in the soup aisle of the grocery store with the rest of the bouillon):


Measure out 1/4 cup and slowly dilute by pouring in a little of the reserved stock at a time. Trust me, do this slowly or you'll end up with a clumpy mess. Go ahead and mix in 1/4 cup of cream sherry, then slowly whisk the sherry/stock mixture into your roux until well combined.


Next add in 4 cups of whole milk in the same manner, whisking it in slowly.


Heat this mixture through and add in 2 Tbs brandy and 1/4 to 1/2 cup of sugar (start with a 1/4 cup and then add to taste from there). Finish off your bisque with 1/2 cup of heavy cream and your chopped lobster meat. Now comes the hard part... trying not to eat it all before you get it to the table :) Enjoy!